Assets Download Chapter 5 folder and assets folder
All layers can be converted to 3D by clicking the 3D switch on the timeline layer options. This opens up a lot of new factors:
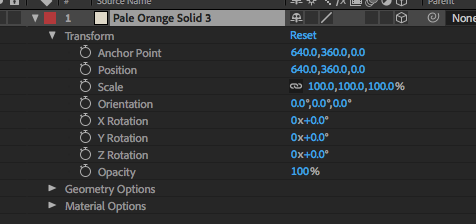
Z space position and rotation
Geometry options
Simple curvature
Material Options
Accepts shadows
Cast shadows
Reflection
Surface material etc.
Once 3D is turned on, you may need to look at the object from different perspectives. Now turn to the stage options and try different view (I usually work with 2 views horizontal). There are many options like top, left, Active camera and custom views which have a diagonal perspective. If the layer is not 3D then only Active Camera is shown.
Here is an exercise to get your head around the 3D aspect of After Effects (This is not on Lynda)
Create a new comp. Start with a transparent background
We'll use solid layers so we don't have to struggle with the anchor point of multiple shapes
Layer>New>Solid Change the width and height to 400 (it will be easy to do the math with a number like this) and start with a color that that will be a good contrast to the background
Rename the layer to "Front"
Turn on 3D
Select the Pan Behind tool and pull the anchor point to the bottom of the layer. You should have the Anchor point transform settings to 200, 400, 0
Change to 2 views. Make sure one view is Active camera and the other is left (you should only see a thin line)
Duplicate the Front layer and name the second layer "Bottom". Change the color by going to Layer>Solid Settings.
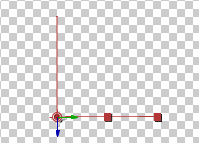
Rotate the X position to 90 degrees. You should have this in your left view:
Duplicate the Front layer again and name the new layer "Back" and change the color
Change the Z position to -400
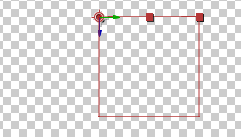
Duplicate the Bottom layer and name it "Top" and change the color
Subtract 400 from the Y position (I get 158)... You should now have something like this:
Switch to top view and turn off the eyeball to the top and bottom layer
Duplicate the front layer and change the color and name it "Left"
Move the anchor point over with the Pan Behind tool and hold the shift key (not in the transform area) so that the X position value is 0 (0, 400, 0) and rotate Y rotation to 90 degrees.
Duplicate the Left layer and name it "Right" and change the color
Add 400 to the X position
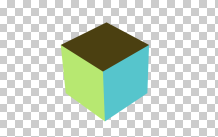
You now have a cube...Switch all layers back on and look at it from different views (including custom view)
To animate this we will work with Parenting
You can select any layer, but I will work with the top layer
Switch back to left view and turn off the Back and Front layers
With the Pan Behind tool holding the shift key down pull the anchor point on the Top layer back to the center 200, 200, 0
With the Pan Behind tool holding the shift key down pull the anchor point down so that the Y position adds 200 to the value. I get 640, 358, -200
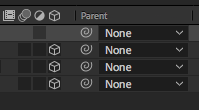
Now parent all layers to the Top layer.
Create keyframes for X, Y and Z rotation, pull the time indicator over and and change all three values to create a second set of keyframes.
Render preview and you should see a rotating cube.
Now lets give it a background and shadow.
Precomp all layers and call the new comp Cube
In the new comp add a new solid with a contrasting color and drag it to the bottom of the timeline...make sure it is the size of the stage
Duplicate the new layer and add the effect Effect>Noise & Grain>Turbulent Noise.
Switch the layer mode to Overlay...this gives some texture
Add a point light layer Layer>New>Light
Turn on the 3D switch for the two bottom layers and the cube layer
Under Point light Light Options make sure Cast Shadows is on
Under Cube Material Options, Make sure Accepts Light and Cast Shadows is on
Under both bottom layers, Make sure Accepts Shadows is on.
You can adjust the intensity of the shadow under the light layer
Shadow Darkness and Shadow Diffusion
Also with the top viewpoint active you can distance the light and background in Z space
Using this method I took a panaramic shot and sectioned it to 4 rectangles facing towards the center. I then placed a camera in the middle and rotated the cube. Here is the result: